
Hey guys! I'm back with a new craft adventure. I'm really quite an amateur at this, so I hit a few stumbling blocks along the way while working on this craft. That's the point of this blog: the chronicle the lessons I learn in crafting!
As the title says, this time I made a Star Wars box. I took pictures of progress, so if you want to do something like this, you can see how I did it. It's really not rocket science, but I did it anyway. On with the show!
For starters, the materials I used consisted of printed Star Wars pictures, black paint, clear gloss paint, decoupage, a sponge brush, scissors, and newspapers to work on.
 Here you can see my newspapers spread out with the blank wooden box in the middle.
First, I took out the backs and glass for the picture frames so I wouldn't have to worry about painting on them while working on my project. The backs were rather stubborn, so I had to use a fork to pry them out.

First things first: we paint the box! I squirted some paint onto a paper plate and used the sponge brush to paint the box. Don't worry too much about painting a second coat. Since most of the box will end up covered by pictures anyway, its not worth it to give it a second coat of paint.

Here is our lovely box with the outside all painted.

Now we paint the inside of the box! Complicated, huh?

Once the box is all nice and painted and dried, I painted a coat of gloss paint on the frames to
make them look nice.

So now that our box is nice and painted, its time to cut out the pictures we are going to use! Yay!

Now the real fun begins! Pick your pictures and then use your sponge brush to adhere decoupage to the back of your pictures. Be careful not to overdo it, or else your pictures will wrinkle. Place the picture on the box where you want it, and smooth it out. Once the picture is dry, coat it over with more decoupage to seal it down. Keep placing pictures on wherever you'd like!

At the end of day one, this is my progress so far.

And this is how it looks at the end of the project!

Left side detail.

Top detail, facing foward.

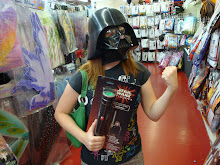
Front detail.

Back detail.

Top detail, facing backward.

Right side detail.
Well, that about does it! I'll see you next time on Adventures in Craftland!

No comments:
Post a Comment